Pages

Showing posts with label Recipes. Show all posts

3.11.2013

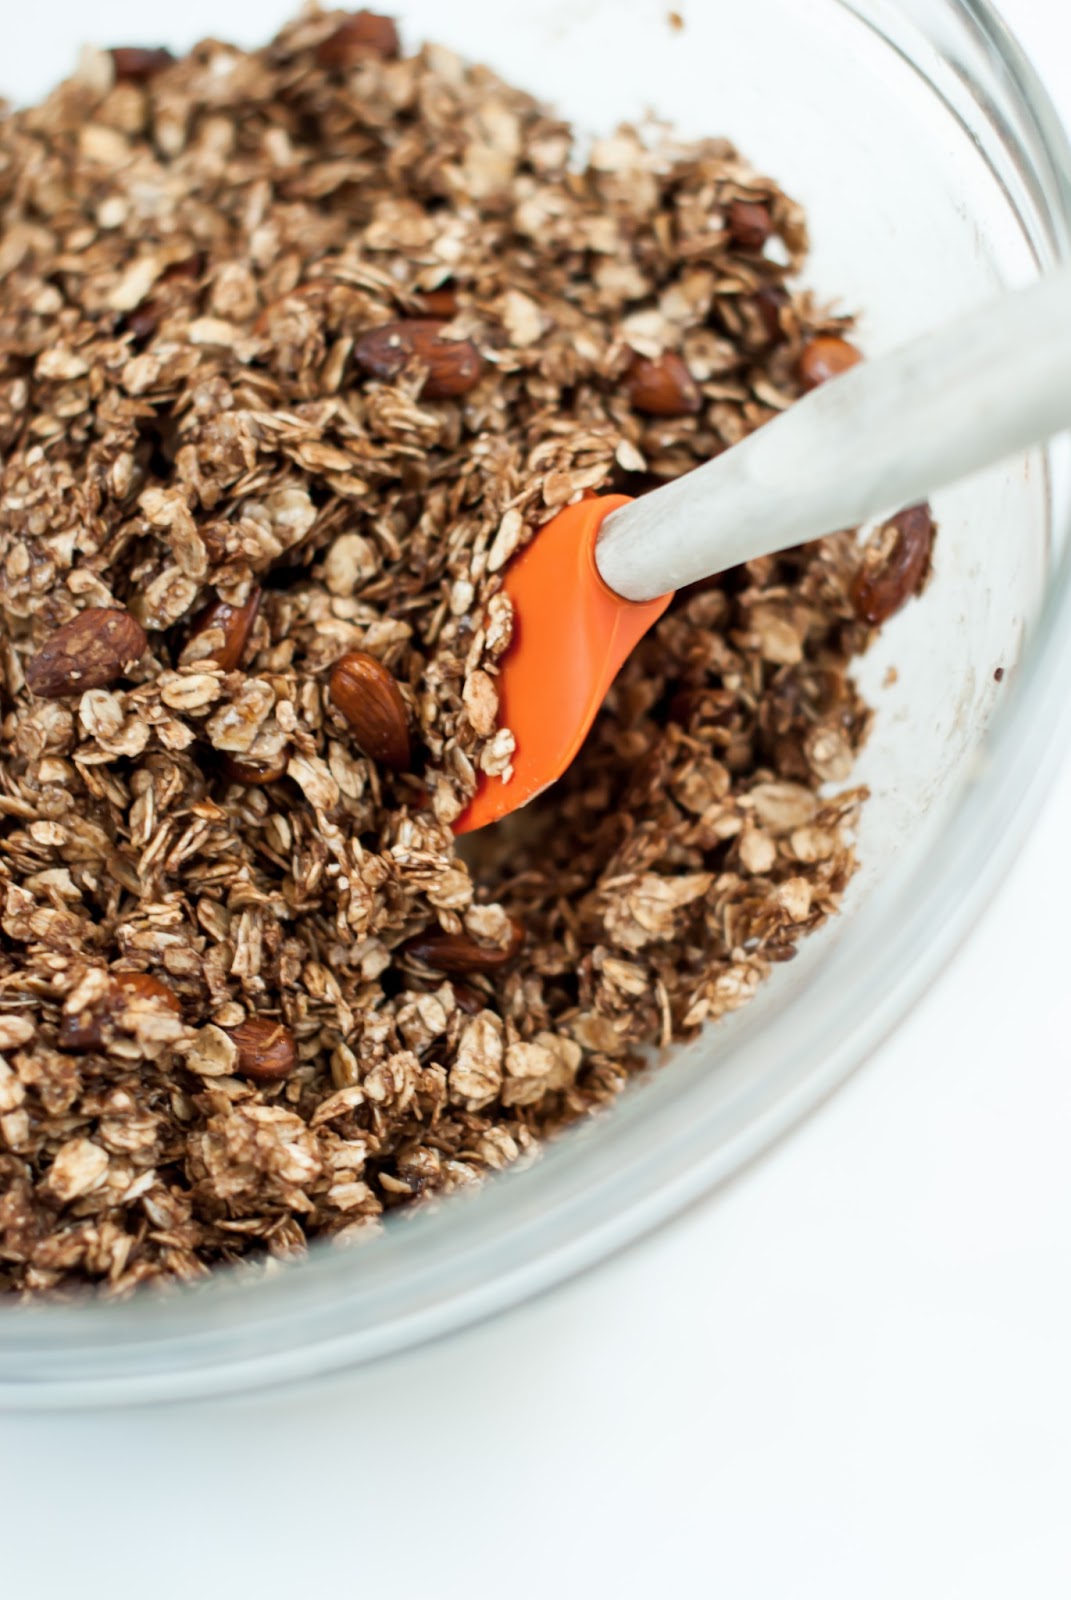
A Recipe & Review: Cocoa Almond Granola by Joy the Baker

If there's one blog you absolutely need to be reading, it's Joy Wilson's Joy the Baker food blog. People, she is hilarious, and her recipes are always incredibly tasty. I think most of her subscribers secretly want to be her best friend. Right?! If you're thinking about getting a cookbook that offers sweet treats, baked goods, and green smoothies, this one has to be on your kichen shelf! 

As part of my decision to start including recipe books in my review list, I've been confronted with the dilemma of how one actually reviews a cookbook. Do you try everything single recipe and then report back? Or, do you try a few things, give it a yay or nay, and call it a day? 

The latter seemed like the most reasonable option because if you're anything like me you probably have a ton cookbooks-- some you rely on to make a few delicacies on special occasions, gifts that are beautiful but too scary to actually bake from, and then all the others that are totally reliable companions (save from a fire type books). So, with all that being said, this recipe will be the first installment of three recipes sampled from one title. 

*Note: I would never actually save a cookbook from a fire, or any book for that matter (gasps), but I would certainly get my cats out. 


I decided I'd tackle a recipe that's popular, seldom made at home, and perfect for gifting. 

GRANOLA

Yes, granola. I love the stuff. I eat it sprinkled over my oatmeal or cereal, I mix it in greek yogurt, or scoop it up for a quick snack. The crunch is such a beautiful thing. Plus, granola is incredibly easy to make and doesn't require a lot of time. Win!


Cocoa Almond Granola  
  
4 cups old-fashioned oats
1 cup raw whole almonds
1 cup sweetened shredded coconut
1 1/2 tsp ground cinnamon
2 Tbsp unsweetened cocoa powder
1/2 tsp salt
1/2 cup granulated sugar
1/4 cup honey
1/3 cup vegetable oil
2 Tbsp butter
2 tsp pure vanilla extract

Place racks in the center and upper third of the oven and preheat to 350 degrees F. Line 2 baking sheets with parchment paper and set aside. (I used one large baking sheet and a silpat liner.)

In a large bowl, toss together oats, almonds, coconut, cinnamon, cocoa powder and salt. Set aside.

In a medium saucepan combine sugar, honey, oil and butter. Stir over medium heat until sugar dissolves and mixture begins to bubble. Remove from heat and stir in vanilla.

Pour the warm sugar mixture over the oat mixture and toss with a wooden spoon. Toss until all of the oats and almond bits are at least moistened by the sugar mixture. Spoon mixture onto prepared baking sheets and place in the oven.

Bake granola for 30 minutes, removing from the oven to toss and stir 2 to 3 times during baking. Granola is done when it is toasted around the edges and fragrant. 

Remove from the oven and cool completely. Store in an airtight container, at room temperature, for up to 2 weeks.

Recipe: 4.5 stars out of 5 (reliable companion).
Give it a try! I'm sure you'll love it. 

2.21.2013

A Post: Recipes for Bookworms?


Hi there, bookworms!

I can't tell you how much I enjoy blogging. I love setting goals, working towards them, and meeting great people along the way. However, as much as I love it, I want to make sure you love reading it!

As you know, I occasionally feature my baking creations and really love the process and the feedback. With that being said, I'm thinking about incorporating reviews of cookbooks and the like into the blogging schedule, but wanted to put some feelers out first. Is this something you'd want to see here? If so, let me know in the comments below. Specific requests? Go ahead and throw those up there as well!

Feel free to leave any other suggestions of things you'd like to see in this space!

- Beth

12.19.2012

A Post: Deliver the Christmas Cheer


I can't believe it's already mid-December! It seems like Thanksgiving just ended and I was just starting to decorate the apartment, begin the wrapping and light the pine scented candles. It actually felt too early. Like I was betraying Thanksgiving in some way. However, I guess I'm glad I got a start on it all because it's less than a week away! I got the shopping done early, and actually only had to call about two gifts that were missing, and fight over one parking space to replace one of those aforementioned gifts. So. I'm officially done with the gift getting and have a few packages to wrap up before I can sit back and relax.

Our apartment's generally clear surfaces are currently covered by boxes wrapped in festive paper and bags full of surprises. I love to choose little things for my loved ones that I know will bring the biggest smile. I keep mental notes of all the things they've mentioned throughout the year so they get the perfect little something. However, purchased items aren't always the meaning of success, so I decided to throw in some homemade gifts to lighten the load and spread the love. Sorry for all the Instagram/camera filtered photos... I was too lazy to get out the dslr.

Here's a couple I'd like to share that are simple enough to finish just in time for the big day.


S'mores Kits


I initially found this gem on Pinterest during Halloween. When I saw Christmas tree shaped Peeps at the grocery story, I figured I'd give it a go. S'mores just happen to be one of my most favorite desserts, and these festive little trees make it the cutest treat.

What you'll need: (Note: I'm a craft hoarder, ask J.. he'll confirm, so I had all of this stuff around the house. I'm saying this so you don't feel like a weirdo if you don't.)

1 box Christmas tree shaped Peeps (they also have gingerbread men and snowmen)
1 bag Hershey's mini bars
1 box of graham crackers (if you're feeling up to it you can make your own, I like this recipe.)
Sandwich bags
Treat bags
Ribbon, Yarn or Twine

I use sandwich bags to keep the contents fresh so that the recipient can choose to eat them right away or save for later. If you have a vacuum sealer, you're way cooler than me, and should definitely use that. Place two graham crackers, two Peeps and two hershey bars next to one another (you can also play around with the placement) in the sandwich bag and seal. Place within a festive treat bag, or sheet of tissue paper, or piece of burlap, and make a neat bow with the decorative ribbon, yarn or twine. I also bought mini snowflakes, used a hole punch, and threaded the ribbon through to make gift tags, but you can do whatever you want to add a little extra flair. Finish by smiling innocently while handing over to children already full of SUGAR.

I gave these to all the kids in my extended family and they loved them. Their parents can pop them in the microwave for a quick dessert, or they can snack on the items individually. It might not be the most HEALTHY holiday treat on your list, but it's definitely tasty! It's also really quick and easy. So... you're welcome & enjoy!


Chocolate Chunk Blondies (recipe featured and adapted from Shutterbean.com)


If you haven't tried a recipe from Tracy's blog, you need to do something about that ASAP because they are the best. Like Joy the Baker (they actually have a podcast together), she features delicious goodies that are sometimes healthy, and a lot of times not, with good ingredients and awesome photo steps to match. To say I'm in love with her blog is an understatement. When I saw her recipe for these blondies, I knew I had to make them for my Dad's family Christmas party. Total success. Seriously, I didn't even get to bring any left overs home, which is rare considering the amount of desserts often present.

(I briefly considered using butterscotch with chocolate chips, which you can totally do, but decided against it. Next time, I say!)

What you'll need:


  • 1/2 pound (2 sticks) unsalted butter, at room temperature
  • 1 cup light brown sugar, lightly packed I used half dark and half light, but it's whatever
  • 1/2 cup granulated sugar
  • 2 teaspoons pure vanilla extract
  • 2 extra-large eggs, at room temperature
  • 2 cups all-purpose flour
  • 1 teaspoon baking soda
  • 1 teaspoon kosher salt
  • 1 1/2 cups chopped walnuts I'm weird about nuts in my desserts so I didn't add these
  • 12 oz. semi-sweet chocolate chips 
  • Small bag of decorative M&Ms of your choice I chose the green and red colored, dark chocolate.

Preheat the oven to 350 degrees. Grease and flour an 8 x 12 x 2 inch baking pan.
In the bowl of an electric mixer fitted with the paddle attachment, cream the butter, brown sugar, and granulated sugar on high speed for 3 minutes, until light and fluffy. With the mixer on low, add the vanilla, then the eggs, one at a time, and mix well, scraping down the bowl. In a small bowl, sift together the flour, baking soda and salt and with the mixer still on low, slowly add flour mixture to the butter mixture. Fold in chocolate chips with a rubber spatula.
Spread the batter into the prepared pan and smooth the top. I chose to add festive M&Ms to the top of the blondies to make a little design. Lightly press them into the very top of the dough in whatever design you choose or sprinkle them over (again lightly pressing in). Bake for 30 minutes (or what seems like forever in my ridiculous oven).

The finished product: 


Hope everyone is having a happy holiday! Remember to reach out to all those that love and let them know how much you care. :)

11.09.2011

Snacks from Scratch - Homemade Cheez-Its

This blog kind of turned into all the things that take up my free time.  Hey, you guys must reap the benefits sometimes. I hope, anyway.

A week ago, J and I went on a little Midwest adventure to visit family and take a mini-vacation before returning to the routine.  We drove from Atlanta to Illinois and then back again in the of span 5 days.  We stopped in Chicago (my first visit!) and Louisville before the grand finale: Great Smoky Mountains National Park in Tennessee.  It was fantastic.  J + the road + singalongs + open fields + new destinations. What's not to love? To make the trip a little better (and to save a little $$) I decided to pack up some goodies, made in our very own kitchen, to satiate J's need for delicious snacks while driving 11 hours.  Eek!  (This especially works if you're trying to clean out the fridge or cupboard before taking off for a bit.)

I'd love to call this one my own. Sadly, I'm relegated to saying that I can bake them fantastically, but certainly didn't think this one up.  If you don't follow The Cozy Kitchen, please take a moment after reading to take a peek. You will thank me.

Homemade Black Pepper Cheez-Its


Way easy.  And SO much better than that big red box you pick up at the grocery store.  If you love to bake, you have to try them.  I give you my word.
Enjoy! 

7.15.2011

Summertime Pie With Blueberries, Raspberries and Blackberries

My friend Mandy from Multiple Factors invited me to a little get together to celebrate the 4th of July by watching fireworks and meeting new people.  And so, I decided to bake a pie.  With a little (huge) nudge from the Whole Foods website, I bought a load of fresh berries and got to work.  Needless to say, the pie was a success! Pardon my photos: these iPhone shots were the best I could do at the time. 


Recipe via Whole Foods

What you need:

2 1/2 cups flour, divided
2 teaspoons granulated sugar
Salt
3/4 cup (1 1/2 sticks) butter, chilled and cut into small cubes 
(I did about a cup and a half for all berries, excluding blueberries which were about 2 cups)
3 cups (about 3/4 pound) blackberries
3 cups (about 3/4 pound) raspberries
2 cups (about 1/2 pound) blueberries
1/2 cup plus 1 tablespoon raw or turbinado sugar, divided (I used light brown sugar)
Zest of 1 large orange or lemon
1 tablespoon milk or heavy cream

How to do it:

Put 2 cups of the flour, granulated sugar and 1/4 teaspoon salt in the bowl of a food processor and pulse briefly to combine. (I use a pastry blender, so don't fret if you don't have a food processor!) Add butter and pulse until mixture resembles coarse meal. (Alternatively, cut butter in by hand with two table knives.) Add 1/4 cup ice-cold water and pulse, or mix by hand with a fork, just until dough begins to come together. Form dough into two 4-inch discs, cover and chill until firm, about 2 hours or overnight. 

Preheat oven to 350°F. Put blackberries, raspberries, blueberries, 1/2 cup of the raw sugar, remaining 1/2 cup flour, zest and a pinch of salt in a large bowl and mash together gently until well combined and juicy but still chunky; set aside. On a lightly floured surface, roll out one piece of dough into a 10-inch circle and gently transfer to an 8-inch pie pan. Transfer berry mixture to pie pan; set aside.

Roll out remaining dough as you did the first piece and transfer to pie pan, gently draping it over the berry filling. Firmly press the edges together then trim away excess dough. Pinch or crimp edges as desired and cut 3 slits in the top of the pie to allow steam to escape. Brush crust with milk and sprinkle with remaining 1 tablespoon raw sugar then bake until golden brown and bubbly, about 1 hour. Set aside to let cool completely then serve. 
 

6.24.2011

Summer is a Good Time for Pie

Peach Pie in Photos 

I'm from Georgia.  I buy Georgia peaches from a local grower in large bags.  They are juicy and sweet and delicious.

I made this one for my family. 


I snagged the crust from one my favorite sites: simply recipes 

Filling from: food & wine 
I changed it up a bit and added a teaspoon of vanilla extract and a half teaspoon of cinnamon.

Enjoy your weekend! 
Related Posts Plugin for WordPress, Blogger...